
Although there are quite a few tutorials for Predator magnetisation, I decided to post this anyway. This is a tutorial for magnetising a Space Marine Predator tank, to hold all variants both destructor and annihilator as well as a rhino.
This is a list of the magnets I ordered:
20 pcs, diam. 3 mm, thick.1 mm
20 pcs, diam. 3 mm, thick.3 mm
20 pcs, diam. 5 mm, thick.2 mm
10 pcs, diam. 10 mm, thick.1 mm
(convert to inches at your convenience)
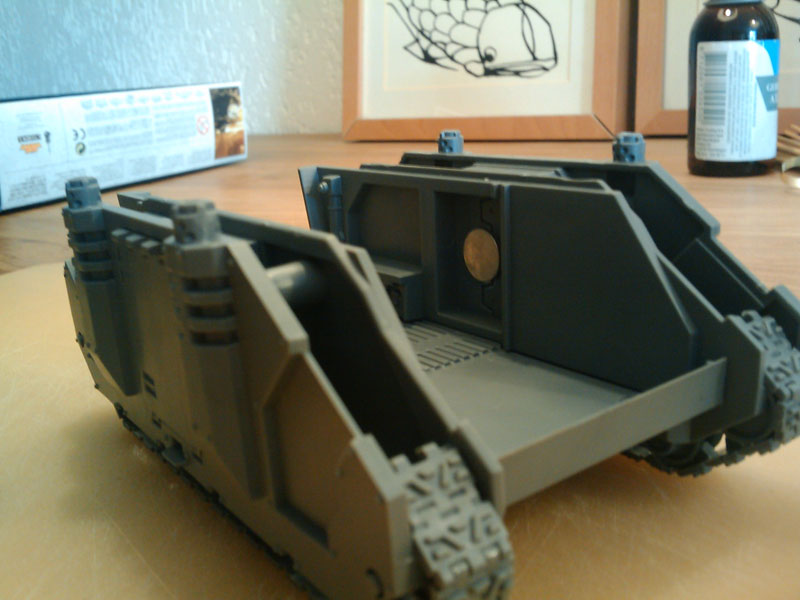
I just assembled the sides and added the tracks. That's all I glued together. Then I superglued the 10mm/1mm magnets on the sponson doors interior.
(Can't stress enough how important it is to check the polarization on the magnets before glueing them. And be careful with the superglue, I already got a magnet glued to my finger, and this glue is VERY strong. Hurt like hell, when I yanked it off.)
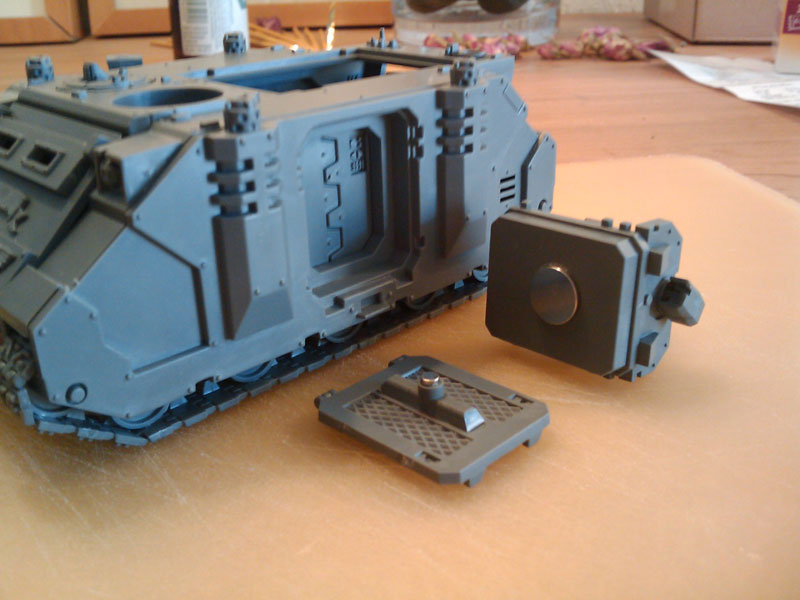
Then I magnetized the sponson doors, quite straightforward, using more 10mm/1mm magnets.
The rhino doors are not inset, like the sponsons, so you need an extension to get the magnet closer to the one on the inside of the pred. I just cut up some sprue and glued a 3mm/1mm magnet on. It holds fine.
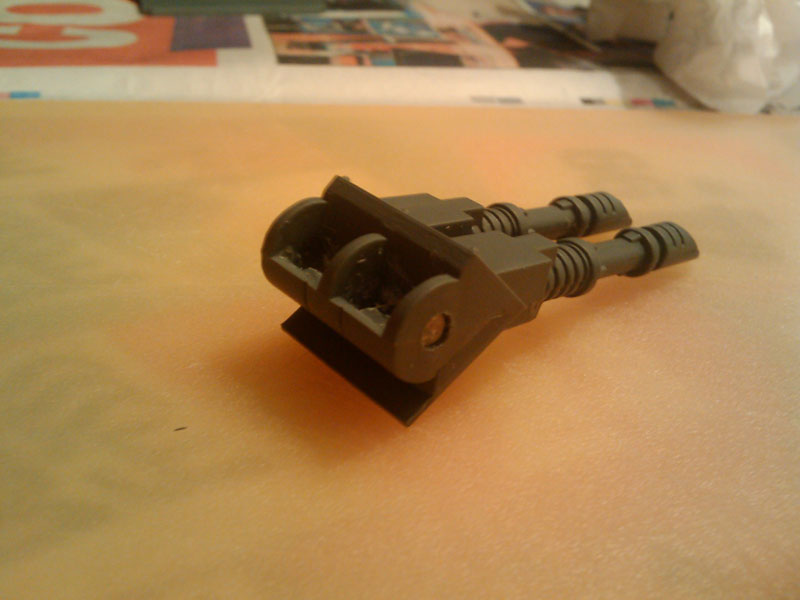
I wanted the guns to be swappable, so I had to find a way to magnetize them as well. I decided to leave the guns in 2 parts and use the pull of the magnet to fix them together. I cut up a base and used the piece to give the magnet a bit more reach. I used the 3mm/3mm and it fitted perfectly. (I left the lascannon for later. Cause I forsee a bit more work there. Will of course update with pics.) I did glue the camera to the ...uhm... stick-thingy that connects to the gun, but it is still free to rotate.
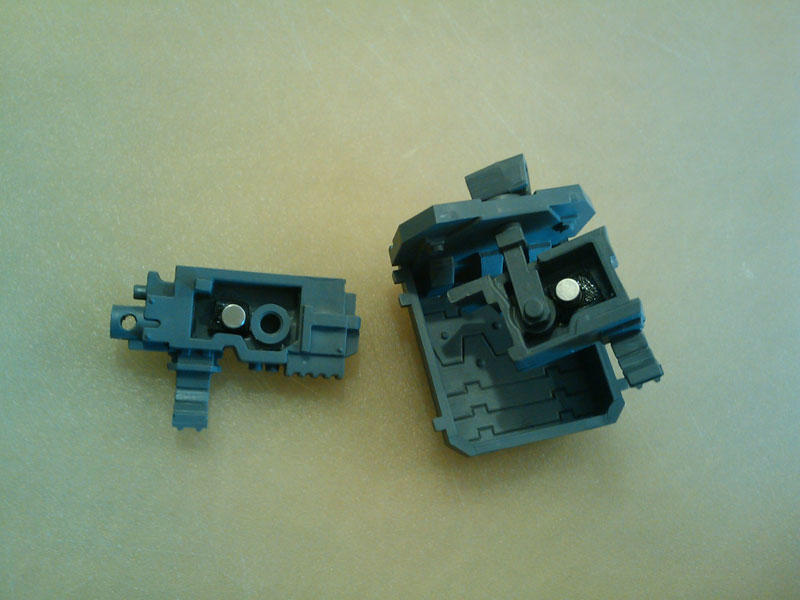
Then I started on the turret weapons. I simply cut of the pegs on both weapons and drilled holes to hold the magnets. The 3mm/1mm magnets fit perfectly in the holes where the pegs normally go.
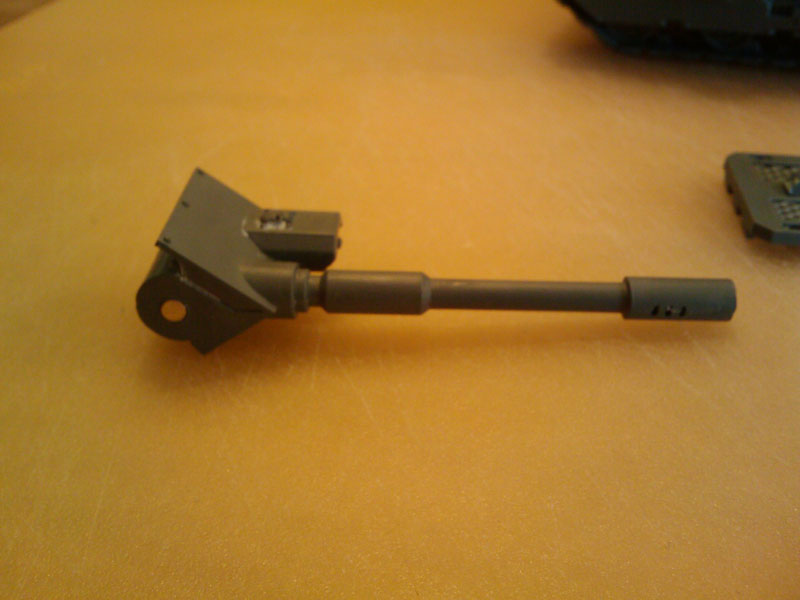
The auto cannon tends to dip so I decided to add another magnet in the back of the gun. I had to use some GS to get a magnet on the right spot. (I know the green blob looks a bit messy, I wasn't patient enough so I had to fix it later on.)
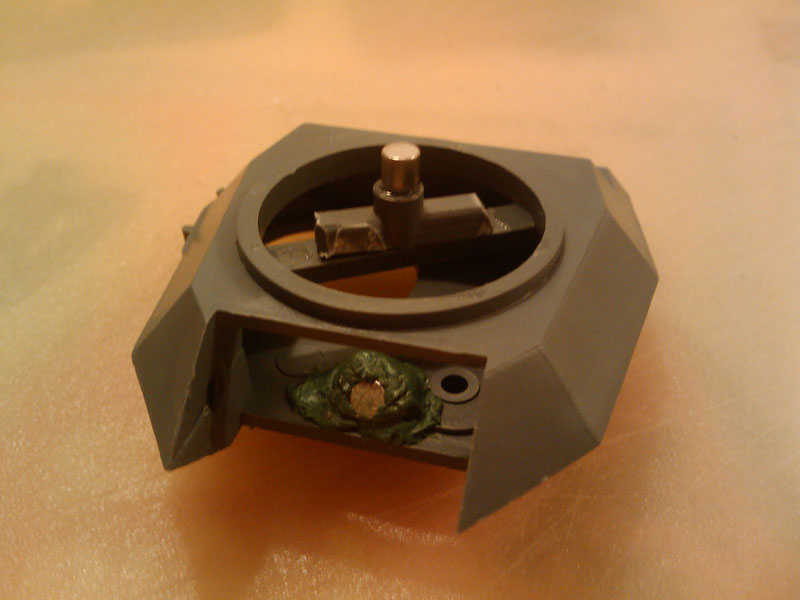
You'll notice that I used the same method as on the rhino door to get the magnet closer to its counterpart on the hull, a bit of sprue.
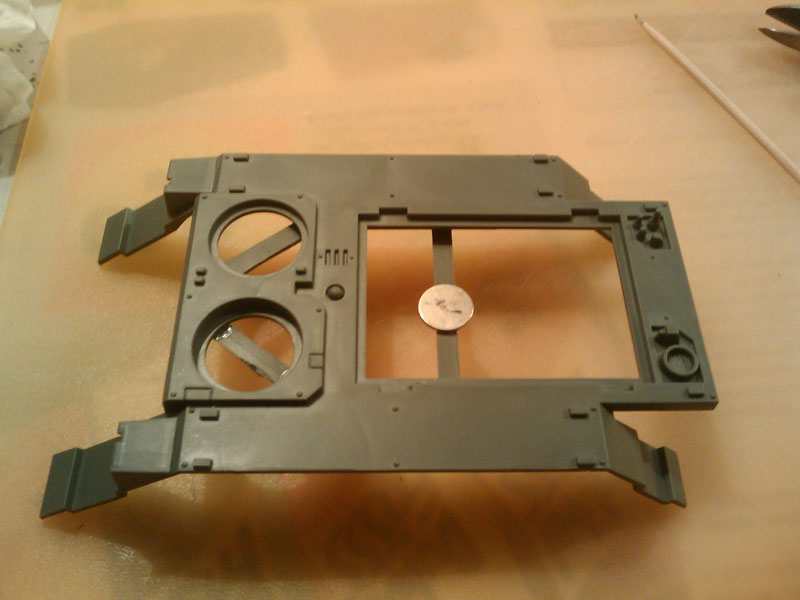
The inside looks like this:
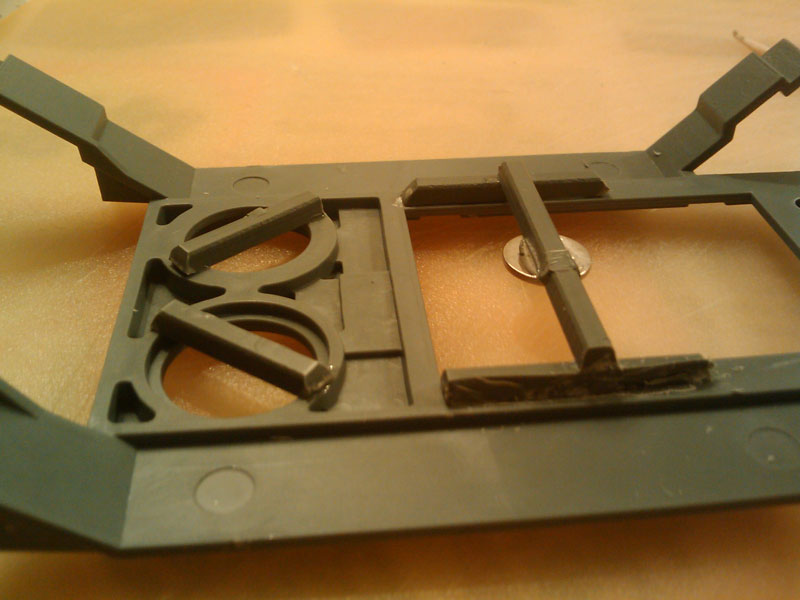
I use more bits of sprue to fit the magnet. The magnets do not touch, but still have a strong hold.
I already added more sprue to the hull to place the lids on. Next up is the rhino roof-plate and the lascannons. Will post pictures when I have em.
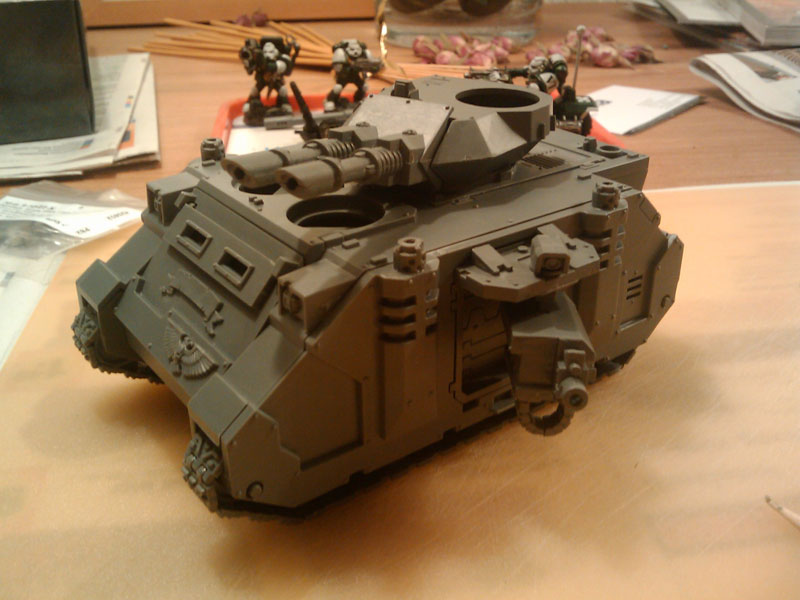
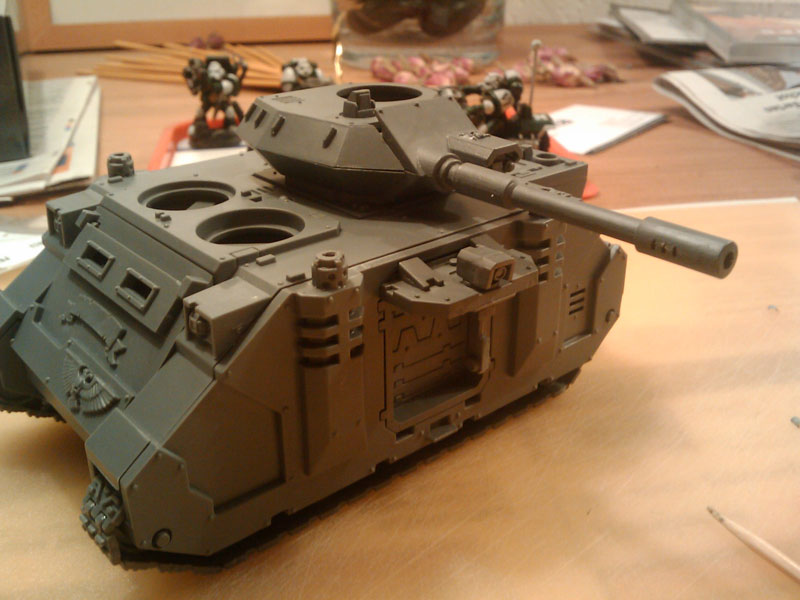
This is it so far:
This is a list of the magnets I ordered:
20 pcs, diam. 3 mm, thick.1 mm
20 pcs, diam. 3 mm, thick.3 mm
20 pcs, diam. 5 mm, thick.2 mm
10 pcs, diam. 10 mm, thick.1 mm
(convert to inches at your convenience)
I just assembled the sides and added the tracks. That's all I glued together. Then I superglued the 10mm/1mm magnets on the sponson doors interior.
(Can't stress enough how important it is to check the polarization on the magnets before glueing them. And be careful with the superglue, I already got a magnet glued to my finger, and this glue is VERY strong. Hurt like hell, when I yanked it off.)
Then I magnetized the sponson doors, quite straightforward, using more 10mm/1mm magnets.
The rhino doors are not inset, like the sponsons, so you need an extension to get the magnet closer to the one on the inside of the pred. I just cut up some sprue and glued a 3mm/1mm magnet on. It holds fine.
I wanted the guns to be swappable, so I had to find a way to magnetize them as well. I decided to leave the guns in 2 parts and use the pull of the magnet to fix them together. I cut up a base and used the piece to give the magnet a bit more reach. I used the 3mm/3mm and it fitted perfectly. (I left the lascannon for later. Cause I forsee a bit more work there. Will of course update with pics.) I did glue the camera to the ...uhm... stick-thingy that connects to the gun, but it is still free to rotate.
Then I started on the turret weapons. I simply cut of the pegs on both weapons and drilled holes to hold the magnets. The 3mm/1mm magnets fit perfectly in the holes where the pegs normally go.
The auto cannon tends to dip so I decided to add another magnet in the back of the gun. I had to use some GS to get a magnet on the right spot. (I know the green blob looks a bit messy, I wasn't patient enough so I had to fix it later on.)
You'll notice that I used the same method as on the rhino door to get the magnet closer to its counterpart on the hull, a bit of sprue.
The inside looks like this:
I use more bits of sprue to fit the magnet. The magnets do not touch, but still have a strong hold.
I already added more sprue to the hull to place the lids on. Next up is the rhino roof-plate and the lascannons. Will post pictures when I have em.
This is it so far:
Geen opmerkingen:
Een reactie posten